I’d always thought a mended sock would have an uncomfortable seam, but it turns out you just need to know how to do it properly. It does help that I like thick, squishy socks. And I thought that folks mostly only mended hand-made socks, but I’ve been mending our factory-made socks without issue.
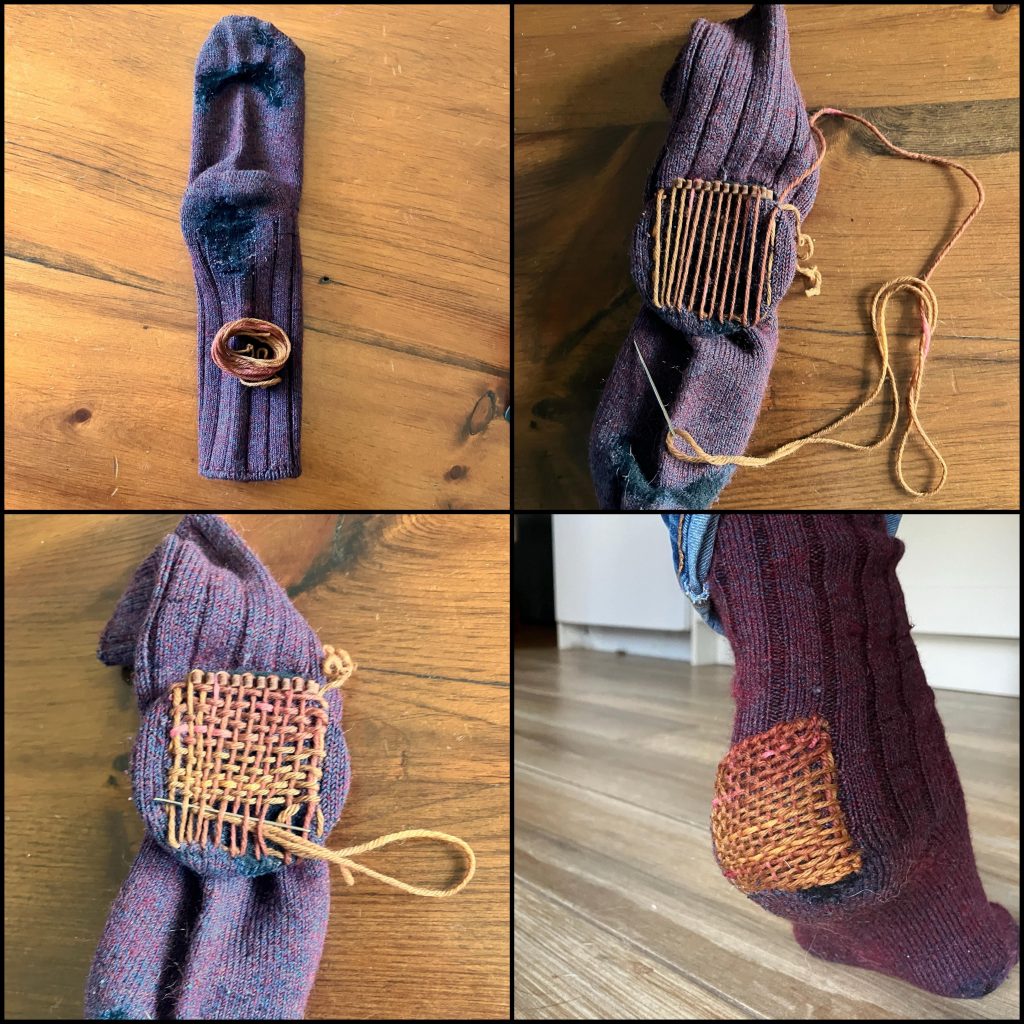
So far, I’ve been using a needle weaving method for visible mending, and I find it is effective but fiddly. Somewhere around here I even have a cute little mending loom by Katrinkles, but I’ll be arsed if I can find it. Here’s an example of the needle weaving technique from when I first tried it (I’ve learned a few tricks since!)

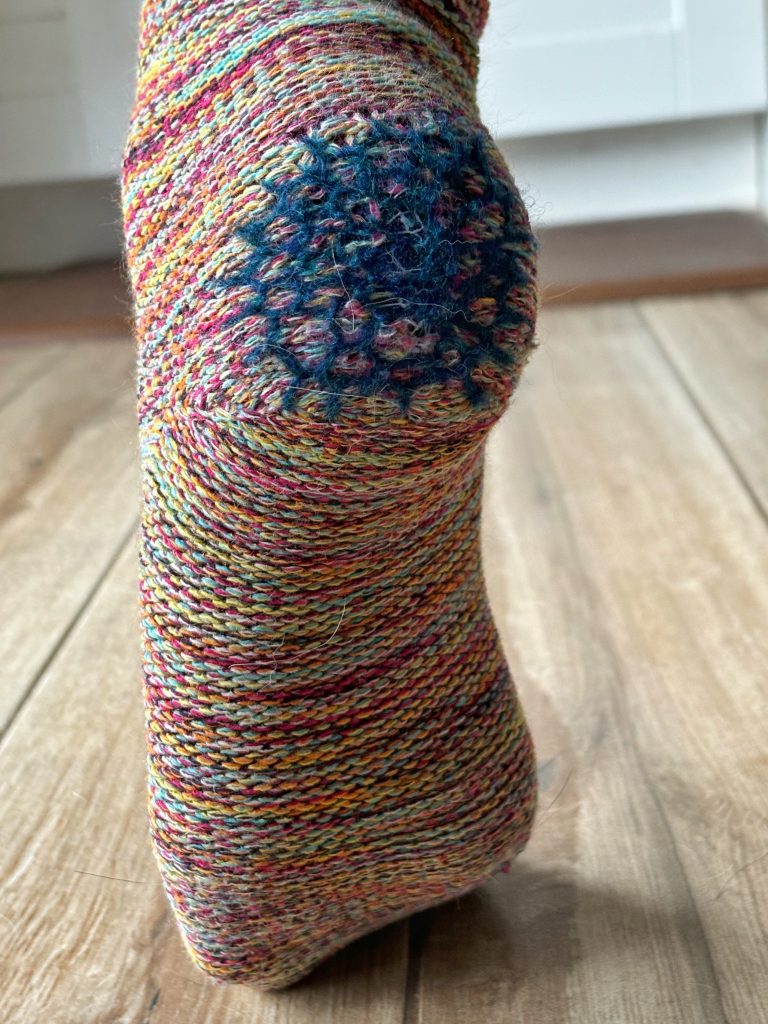
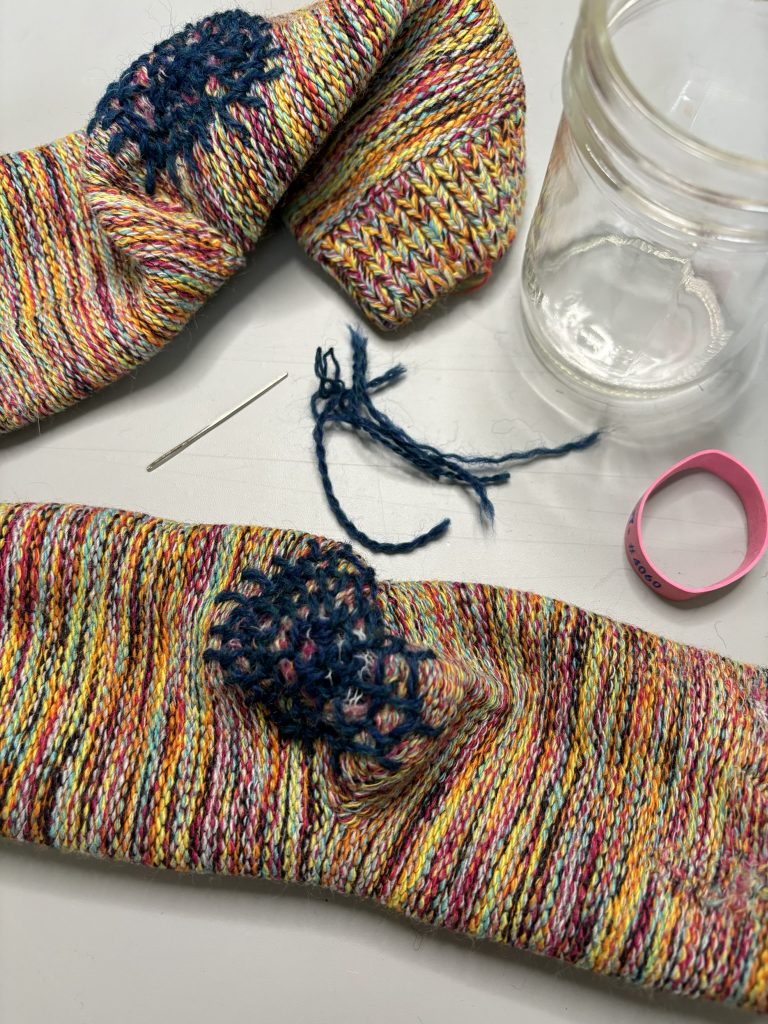
On these socks, I thought I’d try a different method. I followed this video on honeycomb darning by the slow stitch club, and I was pleased to see it was just easy loops of blanket stitch in a spiral. MUCH less fussy than needle weaving, though I don’t think you could use the honeycomb method over a hole, just to reinforce a bare spot. I used some teal fingering weight yarn that I had in my stash.
The more socks I mend, the more I realize that you don’t need supplies beyond the very basics: scissors, needle, yarn. I used a 500ml smooth mason jar and an elastic instead of a darning mushroom and it works fine, but if I do find one second-hand at a flea market or sale somewhere, I might pick up a darning mushroom – mostly because they’re lovely in a vintage-retro sort of way.
Bring your yarn in about 10 cm from where you want to begin. You don’t need to make a knot (it would potentially be an uncomfortable spot rubbing against your foot) as you’ll weave the loose end in later. Using blanket stitch, make an outline leaving a generous margin around the bare patch. Once you close the shape, move inward and continue with another round of blanket stitch, this time catching the first round in each stitch. Since you’re making a smaller shape, you won’t make a new stitch for each stitch in the outside round – skip where it makes sense to do so. As you move inward, your stitching will begin to look like a spider web. Once you work your way to the centre, just weave around a few stitches to secure your yarn, pull through and cut. Weave in your end, and pull the long tail you left at the beginning back and weave that in too. That’s all there is to it – much more art than science!


You’ll note in the image at left above, the wool has felted slightly. I was worried about the colour running so I ran the mended socks through the laundry with some old towels, completely forgetting that I’d used 100% wool to mend them. They felted a bit, but in a pleasant way that will ensure those woven ends will not come loose, and the mend doesn’t seem to have distorted by shrinking. I’ll have to be mindful of that in future, though.
Here’s a video I made (learning to mend and learning to make social content – multitasking!) on my first try at honeycomb sock darning – look how easy it is!
Have you tried visible mending? What do you think?
